
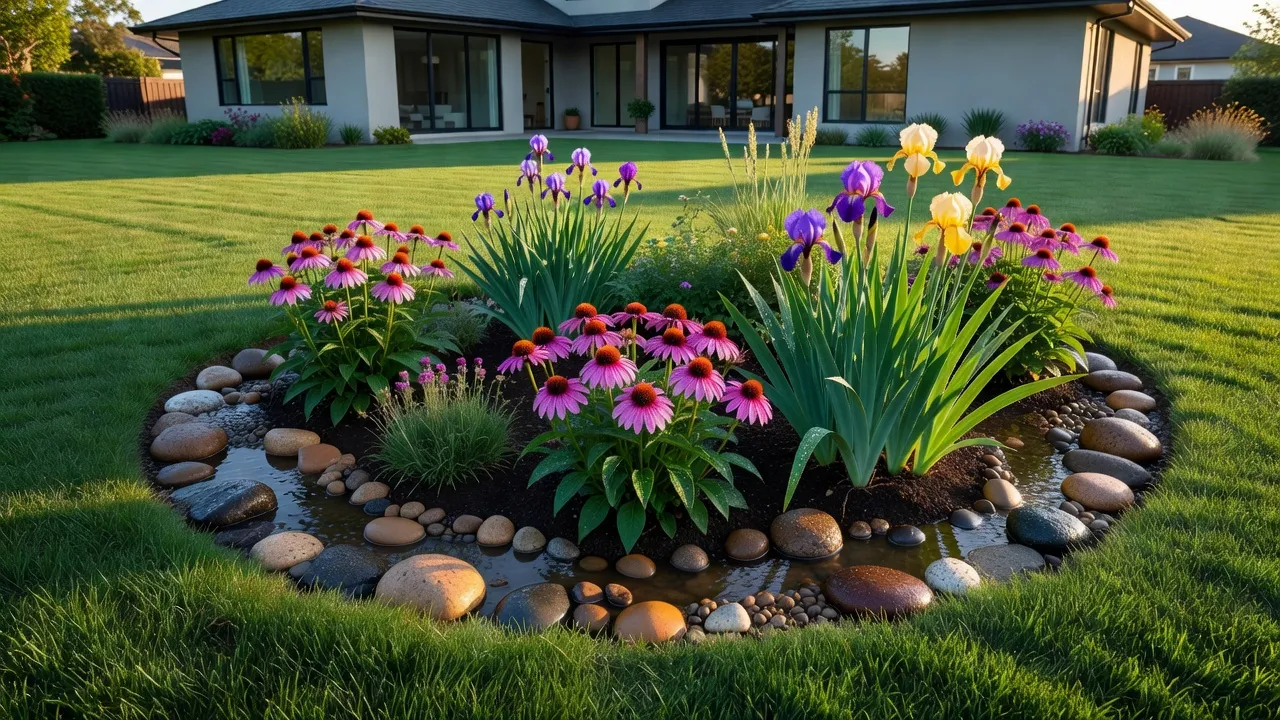
Designing a rain garden requires sizing a shallow 4- to 8-inch depression at least 10 feet from house foundations, testing soil drainage, and planting deep-rooted native perennials. By capturing water from roofs or driveways, a well-planned rain garden allows standing water to soak naturally into the ground within 24 to 48 hours while keeping polluted runoff out of storm drains.
A successful rainwater garden design turns a soggy yard headache into a vibrant landscape feature. The steps below cover site evaluation, percolation testing, excavation, plant selection, and ongoing maintenance.
Rain Garden Design & Construction at a Glance
| Step | Task Focus | Typical Time Required | Estimated Cost Range | Essential Tools & Materials |
|---|---|---|---|---|
| 1. Site & Utility Check | Mark location, check slope, call 811 | 1 to 2 hours | $0 | Tape measure, line level, spray paint |
| 2. Infiltration Test | Dig 12-inch test hole, time water drop | 24 hours (elapsed) | $0 | Shovel, tape measure, water hose |
| 3. Size & Shape | Calculate square footage based on soil | 1 hour | $0 | Graph paper or design app, stakes, string |
| 4. Excavation & Soil Mix | Dig basin 4-8 inches deep, amend soil | 4 to 8 hours | $50 - $200 | Shovel, wheelbarrow, compost, coarse sand |
| 5. Layout Visualization | Preview garden placement and edge aesthetics | 15 minutes | $0 - $7 (App optional) | Digital layout software or AI redesign tools |
| 6. Planting Native Species | Install plants by moisture tolerance zone | 2 to 4 hours | $150 - $500 | Native plugs/potted plants, hand trowel |
| 7. Mulch & Inflow | Apply 3 inches hardwood mulch, river rock | 2 to 3 hours | $50 - $150 | Shredded hardwood mulch, river rock |
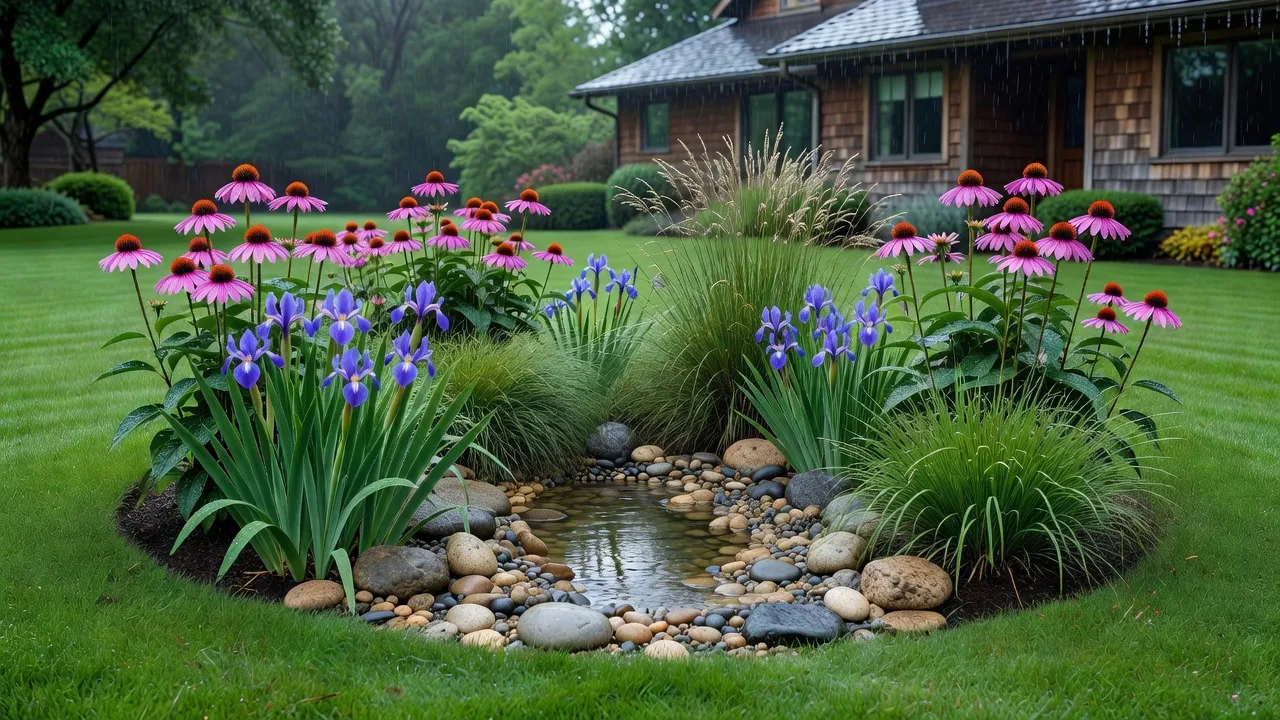
What structural limits rule out a rain garden on your property?
Properties with water tables shallower than 2 feet, slopes steeper than 12 percent, or heavy clay soils draining slower than 0.1 inches per hour cannot safely host a standard rain garden. Attempting a installation under these conditions risks flooded basements, standing mosquito breeding pools, or structural damage to building foundations.
Before buying plants or digging soil, check these four strict site boundaries:
- Foundation Distance: You must place the basin at least 10 feet away from structures with basements or slab foundations. Water infiltrating closer than 10 feet will seep into foundation footings.
- Septic Field Clearance: Keep all excavations at least 50 feet away from septic tanks and drain fields to avoid contaminating wastewater systems or damaging piping.
- Slope Angle: The ideal slope ranges from 1 to 8 percent. Slopes above 12 percent require heavy grading or retaining walls, making standard shallow basins impractical.
- Utility Lines: Never dig without knowing what lies underground. In the United States, calling 811 before digging is a legally mandated step to mark gas, electric, and communication lines.
If your yard fails these spatial requirements, alternative solutions like rain barrels, French drains, or cisterns are safer choices for managing runoff.
Step 1: Site Selection and Utility Clearance
Select a location in full or partial sun that catches downspout runoff naturally while keeping clear of tree drip lines and underground utilities.
To identify the best spot, observe your property during a heavy rainstorm. Watch how water flows off your roof, across paved surfaces, or along lawn swales.
- Track the flow path: Trace where your downspouts discharge water. Position the garden in the natural path of this runoff, keeping a 10-foot buffer from your home foundation.
- Avoid tree roots: Do not dig beneath the drip lines of mature trees. Digging through major roots damages the tree and makes excavation extremely difficult.
- Call utility locators: Dial 811 at least three business days before digging. Public utilities will mark underground pipes and lines with color-coded paint at no cost.
Step 2: Soil Percolation and Infiltration Testing
To run a percolation test, dig a hole 12 inches deep by 12 inches wide, fill it with water, and measure how quickly the water level drops over several hours.
Proper drainage is mandatory. The goal of a rainwater garden design is temporary water storage, not permanent ponding.
- Dig 12" × 12" hole
- Pre-soak soil for 2 hours
- Refill with 12" water
- Measure hourly drop
First, pre-soak the hole by filling it with water and letting it drain completely. This saturates the surrounding soil so your test reflects worst-case rainfall conditions.
Next, fill the hole again with 12 inches of water and place a ruler inside. Measure the drop in water depth every hour for 4 hours.
- Faster than 0.5 inches per hour: Excellent drainage. A basic 4- to 6-inch deep basin will work perfectly.
- Between 0.25 and 0.5 inches per hour: Moderate drainage. Plan for an 8-inch deep basin and mix compost into the native soil.
- Slower than 0.25 inches per hour: Poor drainage. You must excavate deeper (18 to 24 inches) and replace subsoil with a custom bioretention mix (50% sand, 30% topsoil, 20% compost).
Step 3: Sizing and Shaping the Depression
Size your rain garden to equal roughly 10 to 20 percent of the roof or driveway area that drains directly into it.
Calculating the size involves simple math. First, measure the footprint of the roof area connected to the downspout feeding your garden site.
For example, if a roof section measures 20 feet by 30 feet, the drainage area is 600 square feet.
For sandy soil draining quickly, multiply the drainage area by 0.10 (10%). A 600-square-foot roof area requires a 60-square-foot garden (e.g., 6 feet wide by 10 feet long).
For clay soil draining slowly, multiply by 0.20 (20%). That same 600-square-foot roof area requires a 120-square-foot garden (e.g., 10 feet wide by 12 feet long).
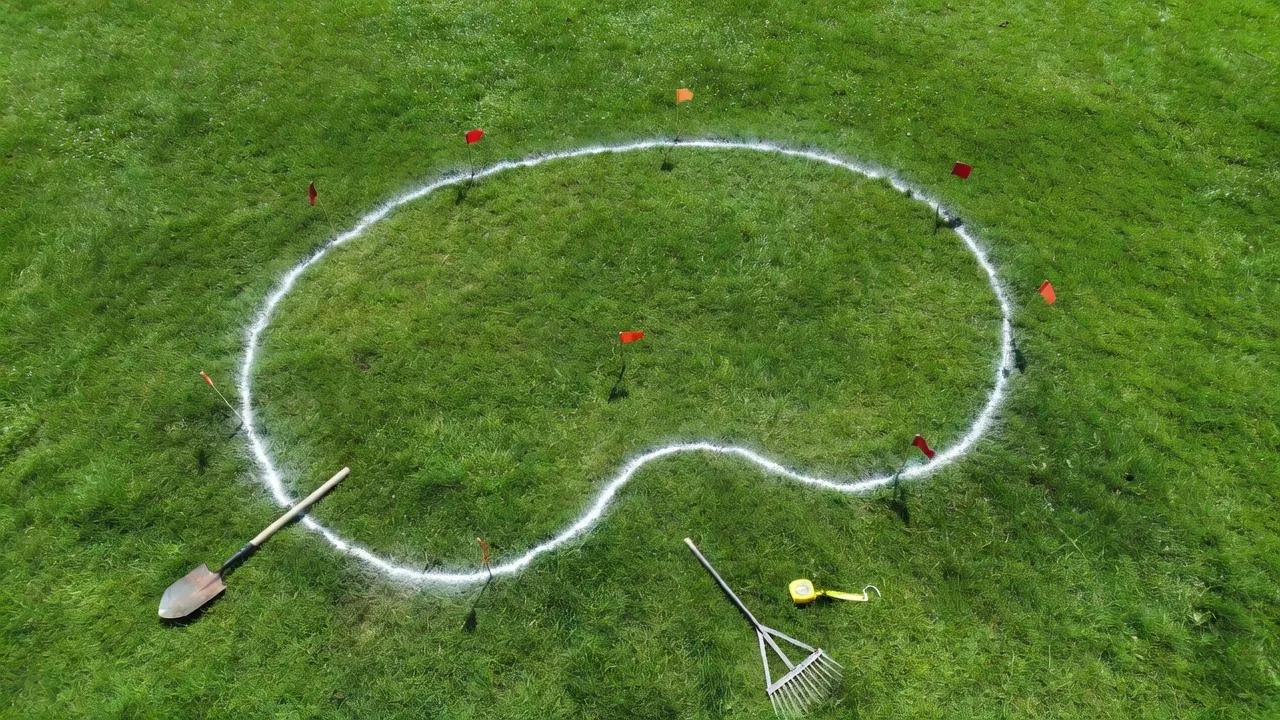
Shape the garden like a crescent, teardrop, or kidney bean with its long side facing uphill to catch maximum water. Use a garden hose or spray paint to outline the shape on your lawn.
Step 4: Excavation and Soil Amendment
Excavate the marked area to a uniform depth of 6 to 12 inches, using the excavated soil to build a raised berm on the downhill side.
Start digging at the high end of the slope and move toward the low end. Ensure the bottom of the basin remains flat and level so water spreads evenly rather than pooling in one small corner.
Use a string level tied between stakes at opposite ends of the basin to confirm the base is completely flat.
As you remove turf and native soil, pile the excess dirt along the lower edge of the garden. Pack this dirt down firmly with a tamper or shovel head to construct a crescent-shaped berm. This berm acts as a mini-dam that holds water inside the basin during heavy storms.
If your percolation test showed moderate clay content, till 2 to 3 inches of organic compost into the top 6 inches of native basin soil. Avoid using heavy machinery inside the garden area, as compacting the soil ruins its ability to absorb water.
Step 5: Visualizing Your Design Layout
Before buying plants or laying rock, preview how the garden shape and plant choices fit your existing yard layout.
It can be difficult to picture how a raw, excavated dirt pit will look once plants mature and blend into your residential curb appeal. For homeowners who want to explore different aesthetic directions before committing dollars, tools like Renova AI make exterior planning straightforward.
You can upload a quick photo of your yard from your phone, pick from over 100 design styles, and instantly preview how various native plantings, rock borders, or garden shapes will look against your home. Download the app directly on the Apple App Store to experiment with custom prompts without needing manual photo editing skills.
If you are expanding your outdoor project, you might also browse examples of beautiful gardens images to decide whether a wild natural look or structured layout best suits your property.
Step 6: Planting Native Species by Water Zones
Arrange plants into three distinct wetness zones based on their moisture tolerance: the wet basin bottom, sloping sides, and dry upper edge.
Divide your rain garden into three zones:
| Zone | Location | Moisture Level |
|---|---|---|
| Zone 1 | Basin Bottom | Wettest |
| Zone 2 | Slopes | Moderate |
| Zone 3 | Rim / Berm | Dry |
Zone 1 is located within Zone 2, which is located within Zone 3.
- Zone 1 (Deep Basin/Bottom): This area experiences standing water for up to 48 hours followed by period dry spells. Choose moisture-loving native species with deep roots like Swamp Milkweed (Asclepias incarnata), Blue Flag Iris (Iris versicolor), and Soft Rush (Juncus effusus).
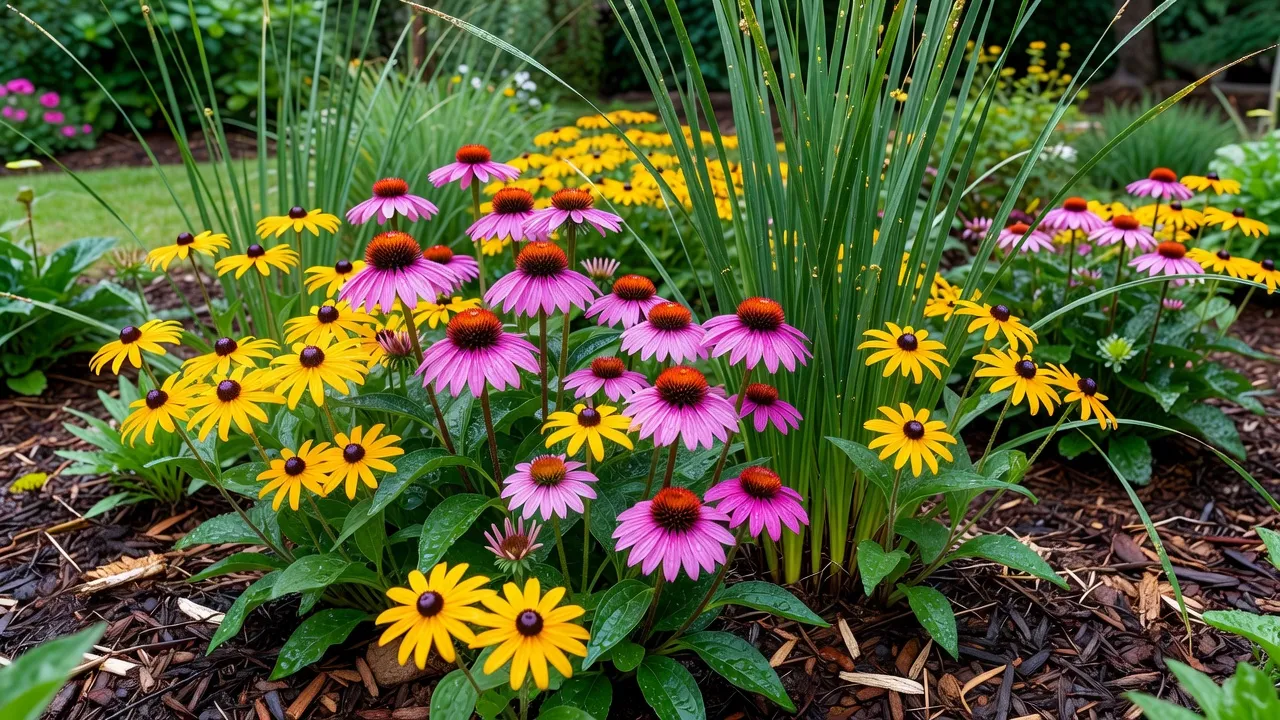
- Zone 2 (Slopes/Sides): This transitional area gets wet during storms but drains rapidly. Plant species like Purple Coneflower (Echinacea purpurea), Black-Eyed Susan (Rudbeckia fulgida), and Bee Balm (Monarda didyma).
- Zone 3 (Berm/Upper Edge): This zone stays mostly dry and prevents erosion along the outer rim. Use drought-tolerant native grasses and perennials like Little Bluestem (Schizachyrium scoparium) and Switchgrass (Panicum virgatum).
Space plants roughly 12 inches apart on center. Using small live plugs instead of large gallon containers saves money and allows roots to adapt faster to native soil conditions.
If you want your installation to support pollinators, combining your layout with a butterfly garden design plan ensures continuous blooms from spring to early autumn.
Step 7: Mulching and Inflow/Overflow Installation
Apply a 3-inch layer of shredded hardwood mulch across the bed, line the downspout entry with river rocks, and notch an overflow exit point on the berm.
Mulch serves three distinct purposes: it suppresses weeds, retains moisture during dry spells, and traps fine sediments carrying heavy metals or motor oil.
- Use shredded hardwood mulch: Always choose coarse, shredded hardwood over pine bark nuggets or wood chips. Light nuggets float away as soon as the garden fills with storm runoff.
- Protect the inflow: Place 2- to 4-inch river stone rocks where downspout runoff enters the garden. The stones dissipate the energy of fast-moving water, stopping soil erosion right at the entry channel.
- Build a spillway: Cut a slightly lower notch into the berm on the side opposite your home. Line this notch with river rock to create a controlled overflow route during extreme 100-year rain events.
What are the best native plants for rain gardens?
Native plants with deep, fibrous root systems like Switchgrass, Blue Flag Iris, Swamp Milkweed, and Joe-Pye Weed are the best choice for rain gardens because they survive alternating flood and drought conditions. Native species adapt to regional climate extremes far better than non-native ornamentals or standard turfgrasses.
According to technical guidance from the U.S. Environmental Protection Agency (EPA), native plant roots expand soil porosity, creating deep channels that allow rainwater to filter far below the surface.
| Plant Common Name | Botanical Name | Native Zone Position | Sun Requirement | Bloom / Color Feature |
|---|---|---|---|---|
| Swamp Milkweed | Asclepias incarnata | Zone 1 (Bottom) | Full Sun | Pink blooms, Monarch host plant |
| Blue Flag Iris | Iris versicolor | Zone 1 (Bottom) | Full Sun to Part Shade | Violet-blue spring flowers |
| Soft Rush | Juncus effusus | Zone 1 (Bottom) | Full Sun | Evergreen structural accent |
| Joe-Pye Weed | Eutrochium purpureum | Zone 1 to 2 (Bottom/Slope) | Full Sun to Part Shade | Tall pinkish-purple clusters |
| Black-Eyed Susan | Rudbeckia fulgida | Zone 2 (Slope) | Full Sun | Golden-yellow summer flowers |
| Purple Coneflower | Echinacea purpurea | Zone 2 (Slope) | Full Sun | Magenta petals, attracts birds |
| Bee Balm | Monarda didyma | Zone 2 (Slope) | Full Sun to Part Shade | Bright red flowers, hummer favorite |
| Little Bluestem | Schizachyrium scoparium | Zone 3 (Edge/Berm) | Full Sun | Bronze fall foliage grass |
For homeowners looking for an informal, romantic aesthetic, adapting a cottage garden design plan using moisture-tolerant native perennials balances structural water management with dense, colourful flower borders.
What rain garden plant lists do university extensions recommend by region or zone?
University extension programs recommend localized plant lists selected specifically for regional rainfall totals, winter hardiness zones, and prevalent soil profiles.
Different geographic regions face distinct environmental challenges. Selecting species verified by local agricultural research centers guarantees higher survival rates.
- Midwest & Great Lakes: The University of Minnesota Extension recommends cold-hardy perennials like Golden Alexander (Zizia aurea), Cardinal Flower (Lobelia cardinalis), and Fox Sedge (Carex vulpinoidea). These plants survive heavy winter ground freezes as well as sudden summer downpours.
- Mid-Atlantic & Northeast: Rutgers New Jersey Agricultural Experiment Station recommends species suited for dense silt and clay soils, including Broadleaf Arrowhead (Sagittaria latifolia), Boneset (Eupatorium perfoliatum), and Virginia Sweetspire (Itea virginica).
- Southeast: Clemson University Cooperative Extension suggests heat-tolerant choices like Cinnamon Fern (Osmundastrum cinnamomeum), Swamp Sunflower (Helianthus angustifolius), and Buttonbush (Cephalanthus occidentalis).
Check your local county extension office to download regional native plant charts verified for your specific USDA hardiness zone.
What plants does the Lady Bird Johnson Wildflower Center recommend for rain gardens?
The Lady Bird Johnson Wildflower Center recommends regional native species such as Swamp Milkweed, Cardinal Flower, Great Blue Lobelia, and Soft Rush for bioretention basins and rain gardens.
Data from the Lady Bird Johnson Wildflower Center Native Plant Database highlights plants that deliver ecological value while handling fluctuating water levels. Their top recommended rain garden selections include:
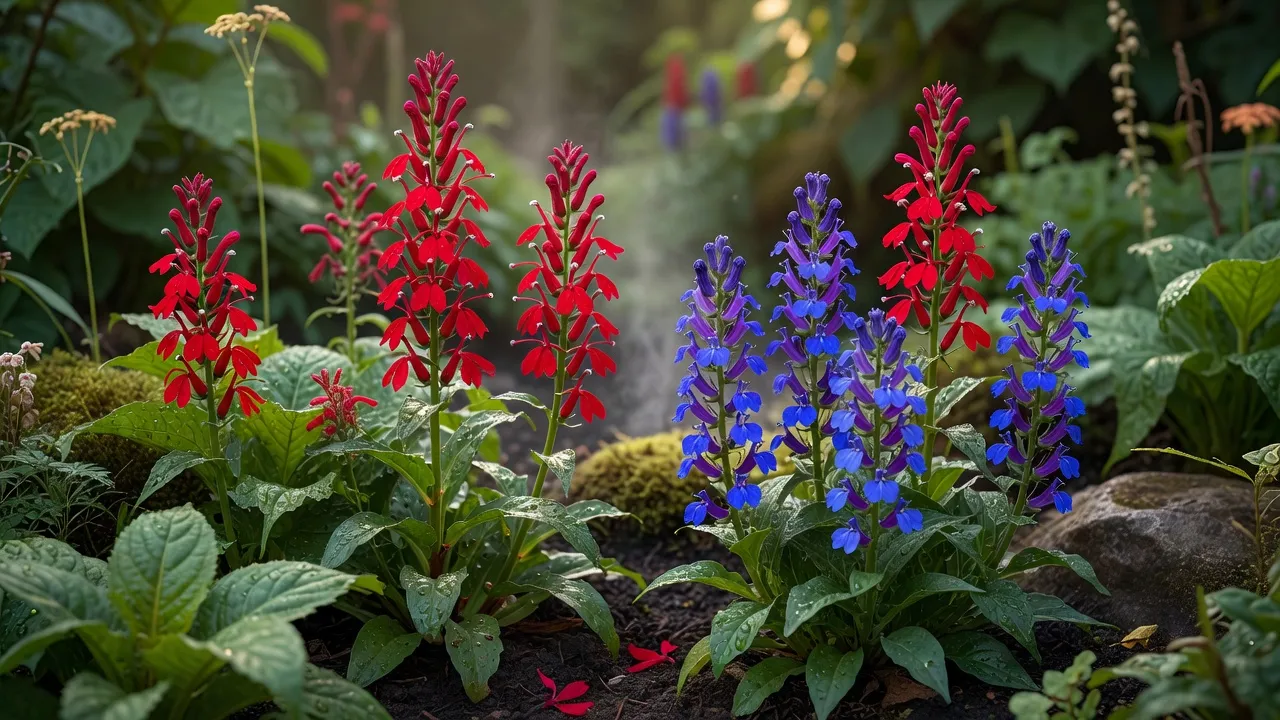
- Cardinal Flower (Lobelia cardinalis): Thrives in wet soils along basin bottoms. Produces vivid red spikes that serve as a crucial nectar source for ruby-throated hummingbirds.
- Great Blue Lobelia (Lobelia siphilitica): A hardy perennial producing rich blue flowers late in the summer season when other garden blooms fade.
- Wrinkleleaf Goldenrod (Solidago rugosa 'Fireworks'): Excellent for upper slopes and edges, providing vital late-season pollen for native bees without spreading aggressively.
- Virginia Wildrye (Elymus virginicus): A cool-season native grass that stabilizes basin slopes against erosion during heavy spring storms.
Mixing these species creates an ecologically diverse habitat that filters water pollutants while providing food and shelter for beneficial insects and local wildlife.
Maintenance Checklist: Keeping Your Rain Garden Functional
A rain garden requires minimal care once established, but simple seasonal maintenance keeps the soil absorbing water efficiently year after year.
As of October 2026, storm management guidelines emphasize keeping bioretention basins free from excess sediment build-up to prevent surface clogging.
First Year Establishment
- Watering: Water plants deeply with 1 inch of water per week during dry periods for the first full growing season until root systems establish.
- Weeding: Hand-pull weeds every two weeks. Avoid chemical weed killers or herbicides, which wash directly into the groundwater during heavy storms.
Annual Spring Maintenance
- Clear Debris: Remove accumulated leaves, trash, and dead plant stalks in early spring before new growth starts.
- Replenish Mulch: Add a fresh 1-inch layer of shredded hardwood mulch if bare soil shows through. Keep total mulch depth around 3 inches.
- Inspect Inflow: Clear excess silt or leaves away from the river stone splash pad where water enters from your downspouts.
Long-Term Care
- Divide Perennials: Every 3 to 4 years, divide overgrown clumps of perennials like Iris and Coneflower to maintain good air circulation and plant vigor.
- Prune Grasses: Cut back native ornamental grasses down to 2 to 3 inches above the ground in late winter before new spring shoots emerge.
Frequently Asked Questions
Frequently Asked Questions
Do rain gardens attract mosquitoes?
No, rain gardens do not breed mosquitoes because they are designed to drain standing water completely within 24 to 48 hours. Mosquitoes require a minimum of 7 to 12 days of stagnant water to complete their egg-to-adult breeding cycle.
How much does it cost to build a rain garden?
A self-installed DIY rain garden typically costs between $3 to $5 per square foot for plants, mulch, and soil amendments. Hiring a professional landscape contractor costs between $12 to $25 per square foot depending on grading requirements.
How deep should a rain garden be dug?
Most residential rain gardens are dug between 4 to 8 inches deep with a flat, level bottom. If your soil has high clay content and drains slowly, you may need to excavate 18 to 24 inches and replace subsoil with a sandy soil mix.
Can I build a rain garden in heavy clay soil?
Yes, you can build a rain garden in clay soil, but you must size the garden larger (20% of roof area) and amend the top soil layer with compost and coarse sand to improve infiltration capacity.
Will a rain garden damage my house foundation?
A rain garden will not damage your foundation as long as it is constructed at least 10 feet away from the home. This distance ensures that infiltrating water drains safely into subsoils away from foundation footings.
Do I need to water a rain garden?
You only need to water a rain garden during its first growing season while plants establish roots, or during severe drought conditions lasting longer than three weeks. Once established, native rain garden plants survive on natural rainfall.
Can I use vegetable plants in a rain garden?
No, you should not plant vegetables in a rain garden. Rain gardens capture urban runoff carrying road oils, pet waste, and roof pollutants that make edible crops unsafe to eat.
How do I stop water from washing away mulch in a rain garden?
Use double-shredded hardwood mulch instead of wood chips or pine bark nuggets, as shredded mulch forms an interlocking mat that resists floating. Placing river rock at the water entry point also slows down incoming torrents.